Daytime Running Lights not working anymore? Is your DRL light on intermittantly? Have you gotten the rude suprise that your DRL module has gone tattletale on you, being presented with a $200+ repair bill even though your lights still work? Wonder why that box costs so much? Do you know that there is an easy fix, but can't find out where the hell that relay is, or what it looks like, because all of the manuals cater to the american version of the car, and the crummy line drawing isn't cutting it?
Update: This fix has been shown to be successful on civics, preludes, and accords, of varying years. The modules all appear to be the same, or very close. So these instructions might work for you. As always, no guarantees. I have gotten dozens and dozens of emails from people who this fix has worked for; if it works for you, please send me an email.
If you're in need, This site is for you! In under an hour, you can repair your DRL module in most cases. The defect is solder joints that go bad over time. It is trivial to repair.
You'll need to find:
Step one is locating the DRL module and removing it. The relay is located above the gas pedal in a 1996 (5th generation) Accord. It's way, way up there. You will have an easier time if you remove the dash panel from the drivers side first; It pulls out with clips. Start on the corner and work your way over.
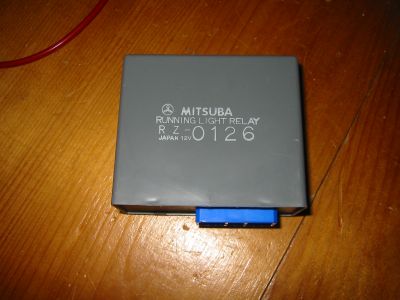
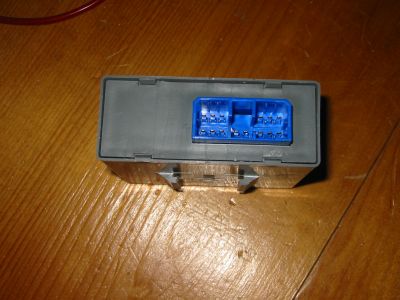
Look for the plastic grey box pictured below, with the characteristic BLUE connector. You remove it by pushing UP until it slides off the connector. It is easier if you remove the connector before you pull it off, but it doesn't matter either way.
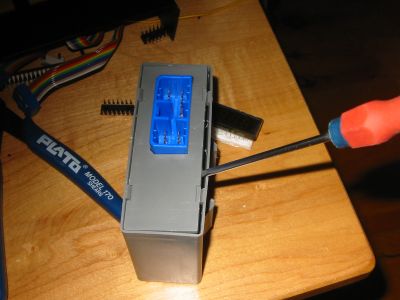
Once you've located that box, you need to pry it open and remove the circuit board. Once the tabs have been pryed up, the board will pull straight out.
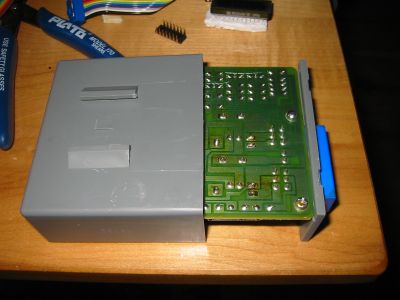
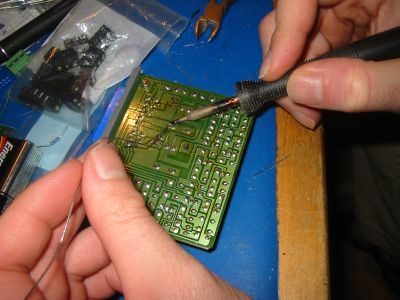
Here are the joints that were defective on my unit. You may have more in addition to these. What you need to watch for are cracks or any surface that does not look smooth. Honda covered the board in grease, probably as a rust preventative measure. You should clean up the joint a little bit before you solder, but it isn't necessary.

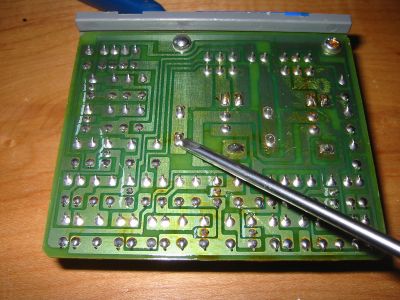
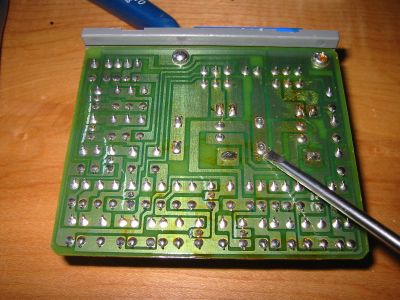
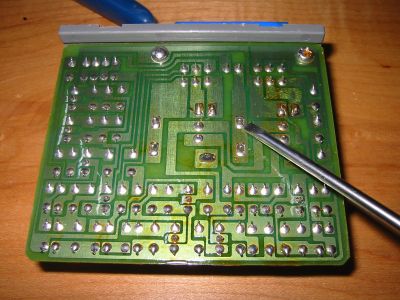
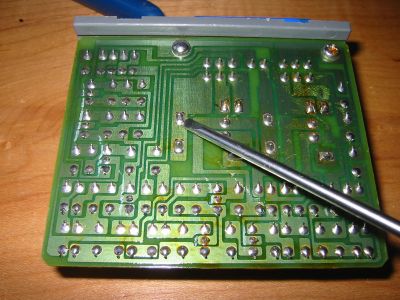
Fixing them is as simple as heating up the joint with a soldering iron - make sure you give it lots of time to melt the crappy old solder, at least 5-6 seconds, then apply some new solder to the joint.
Installation is the reverse of dissasembly. You're done!
 Steve Manley (smanley@nyx.net)
Last Modified: May 10, 2005